Redis三大特殊数据类型
1、geospatial
地理位置
朋友的定位,附近的人,打车距离计算?
Redis的Geo在Redis3.2版本就已经推出!这个功能可以推算地理位置的信息,两地之间的距离,方圆几里的人!
经纬度查询测试:经纬度查询
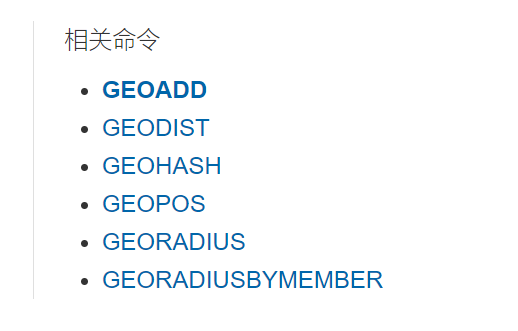
相关命令
1.1 geoadd
将指定的地理空间位置(纬度、经度、名称)添加到指定的
key中。这些数据将会存储到sorted set这样的目的是为了方便使用GEORADIUS或者GEORADIUSBYMEMBER命令对数据进行半径查询等操作。
- 有效的经度从-180度到180度。
- 有效的纬度从-85.05112878度到85.05112878度
1 | 127.0.0.1:6379> geoadd china:city 116.23 40.22 beijing |
1.2 geopos
1 | 127.0.0.1:6379> geopos china:city beijing # 获取指定的经度和纬度 |
1.3 geodist
返回两个给定位置之间的距离。
如果两个位置之间的其中一个不存在, 那么命令返回空值。
指定单位的参数 unit 必须是以下单位的其中一个:
- m 表示单位为米。(默认)
- km 表示单位为千米。
- mi 表示单位为英里。
- ft 表示单位为英尺。
1 | 127.0.0.1:6379> geodist china:city beijing wuhan |
1.4 georidus
以给定的经纬度为中心, 返回键包含的位置元素当中, 与中心的距离不超过给定最大距离的所有位置元素。
范围可以使用以下其中一个单位:
- m 表示单位为米。
- km 表示单位为千米。
- mi 表示单位为英里。
- ft 表示单位为英尺。
1 | 127.0.0.1:6379> georadius china:city 110 30 1000 km # 以100,30这个经纬度为中心,寻找方圆1000km内的城市 |
1.5 georadiusbymember
这个命令和 GEORADIUS 命令一样, 都可以找出位于指定范围内的元素, 但是
GEORADIUSBYMEMBER的中心点是由给定的位置元素决定的, 而不是像 GEORADIUS 那样, 使用输入的经度和纬度来决定中心点
1 | # 找出位于指定元素周围的其他元素 |
1.6 geohash
返回一个或多个位置元素的 Geohash 表示。
该命令将返回11个字符的Geohash字符串。
1 | # 将二维的经纬度转换为一维的字符串,如果两个字符串越接近,则距离越近 |
GEO底层的实现原理其实就是ZSet!我们可以使用ZSet命令来操作geo!
1 | 127.0.0.1:6379> zrange china:city 0 -1 # 查看地图中的全部元素 |
2、Hyperloglog
什么是基数?
A{1,3,5,7,8,7}
B{1,3,5,7,8}
基数(不重复的元素) = 5,可以接受误差
简介
Redis2.8.9版本就更新了Hyperloglog数据结构
Redis Hyperloglog基数统计的算法!
优点:占用的内存是固定的,2^64不同的元素的基数,只需要废12KB内存!如果从内存角度来比较的话,Hyperloglog首选!
网页的UV(一个人访问一个网站多次,但是还是算作一个人!)
传统的方式,set保存用户的id,然后就可以统计set中的元素数量作为标准判断!
这个方式如果保存大量的用户id,就会比较麻烦,我们的目的是为了计数,而不是保存用户id!
0.81%的错误率!统计UV任务,是可以忽略不计的!
1 | 127.0.0.1:6379> pfadd mykey a b c d e f g h i j # 创建第一组元素 mykey |
如果允许容错,那么一定可以使用Hyperloglog!
如果不允许容错,就是用set或者自己的数据类型即可!
3、Bitmaps
位存储
统计疫情感染人数:0 1 0 1 0
统计用户信息,活跃,不活跃!登录、未登录!打卡,365天打卡!两个状态的,都可以使用Bitmaps!
Bitmaps位图,数据结构!都是操作二进制位来进行记录,就只有0和1两个状态!
使用bitmap来记录周一到周日的打卡!
周一:1,周二:0,周三:0,周四:1
1 | 127.0.0.1:6379> setbit sign 0 1 |
查看某一天是否有打卡!
1 | 127.0.0.1:6379> getbit sign 3 |
统计操作,统计打卡的天数!
1 | 127.0.0.1:6379> bitcount sign # 统计这周的打卡记录,就可以看到这周是否全勤 |
事务
Redis事务本质:一组命令的集合!一个事务中的所有命令都会被序列化,在事务执行过程中,会按照顺序执行!
一次性、顺序性、排他性!执行一系列的命令!
1 | ----队列 set set set 执行-------- |
所有的命令在事务中,并没有直接被执行!只有发起执行命令的时候才会执行!
**Redis单条命令是保证原子性的,但是事务不保证原子性(要么同时成功,要么同时失败!)**Redis的事务:
- 开启事务(multi)
- 命令入队
- 执行事务(exec)
正常执行事务
1 | 127.0.0.1:6379> multi # 开启事务 |
放弃事务
1 | 127.0.0.1:6379> multi # 开启事务 |
编译型异常(代码有问题!命令有错!),事务中所有的命令都不会被执行!
1 | 127.0.0.1:6379> multi |
运行时异常(1/0),如果事务队列中存在语法性,那么执行命令的时候,其他的命令是可以正常执行的,错误命令抛出异常!
1 | 127.0.0.1:6379> set k1 v1 |
监控
悲观锁:
- 很悲观,认为什么时候都会出问题,无论做什么都会加锁!
乐观锁:
- 很乐观,认为什么时候都不会出问题,所以不会上锁!更新数据的时候去判断一下,在此期间是否有人修改过这个数据。
- 获取version
- 更新的时候比较version
Redis测监视测试
正常执行成功!
1 | 127.0.0.1:6379> set money 100 |
测试多线程修改值,使用watch可以当作redis的乐观锁操作!
1 | 127.0.0.1:6379> watch money # 监视money |
1 | # 另起线程修改值 |
如果修改失败,获取最新的值就好
1 | 127.0.0.1:6379> unwatch # 1、如果发现事务执行失败,就先解锁 |
Jedis
我们要使用Java来操作Redis
什么是Jedis?
Jedis是Redis官方推荐的Java连接开发工具!使用Java操作Redis中间件!如果你要使用Java操作Redis,那么一定要对Jedis十分的熟悉!
测试
1、导入对应的依赖
1 | <!-- 导入jedis包--> |
2、编码测试
- 连接数据库
- 操作命令
- 断开连接!
1 | import redis.clients.jedis.Jedis; |
输出:

连接过程中出现的问题:
1 | Exception in thread "main" redis.clients.jedis.exceptions.JedisConnectionException: Failed to create socket. |
解决方法:
- 关闭linux的6379防火墙
- 在redis.conf文件中将 bind 127.0.0.1 注释,将protected-mode设置为no
- 在服务器上使用redis-cli -p 6379 连接成功,然后输入shutdown ,然后exit,最后重新输入redis-server redis.conf 重启
- 最后查看redis的进程,如下即可

Key测试:
1 | import redis.clients.jedis.Jedis; |
输出:
1 | 清空数据:OK |
TestString
1 | import redis.clients.jedis.Jedis; |
输出:
1 | =======增加数据========= |
其他的也就不在这里一一练习,和Redis的基本命令完全一样,可以多看基本命令操作
事务
正常执行
1 | import com.alibaba.fastjson.JSONObject; |
输出:
1 | {"name":"ldg","hello":"world"} |
异常执行
1 | import com.alibaba.fastjson.JSONObject; |
输出:
1 | java.lang.ArithmeticException: / by zero |
SpringBoot整合
SpringBoot操作数据:spring-data、jpa、jdbc、mongodb、redis!
SpeingData也是和SpringBoot齐名的项目!
说明:在SpringBoot2.x之后,原来得Jedis被替换为了lettuce?
jedis:采用的直连,多个线程操作的话,是不安全的,如果想要避免不安全,使用jedis pool连接池!更像BIO模式!
lettuce:使用netty,实例可以在多个线程中进行共享,不存在线程不安全的情况,可以减少线程数据,更像NIO模式!
源码分析:
RedisAutoConfiguration类
1 |
|
整合测试
1、导入测试
1 | <!-- 操作redis --> |
2、配置连接
1 | # SpringBoot 所有的配置类,都有一个自动配置类 RedisAutoConfiguration |
3、测试
1 |
|
IDEA 输出:
1 | ldg |
Linux服务器上查看keys *,发现乱码
1 | 127.0.0.1:6378> keys * |
解决服务器上乱码问题:
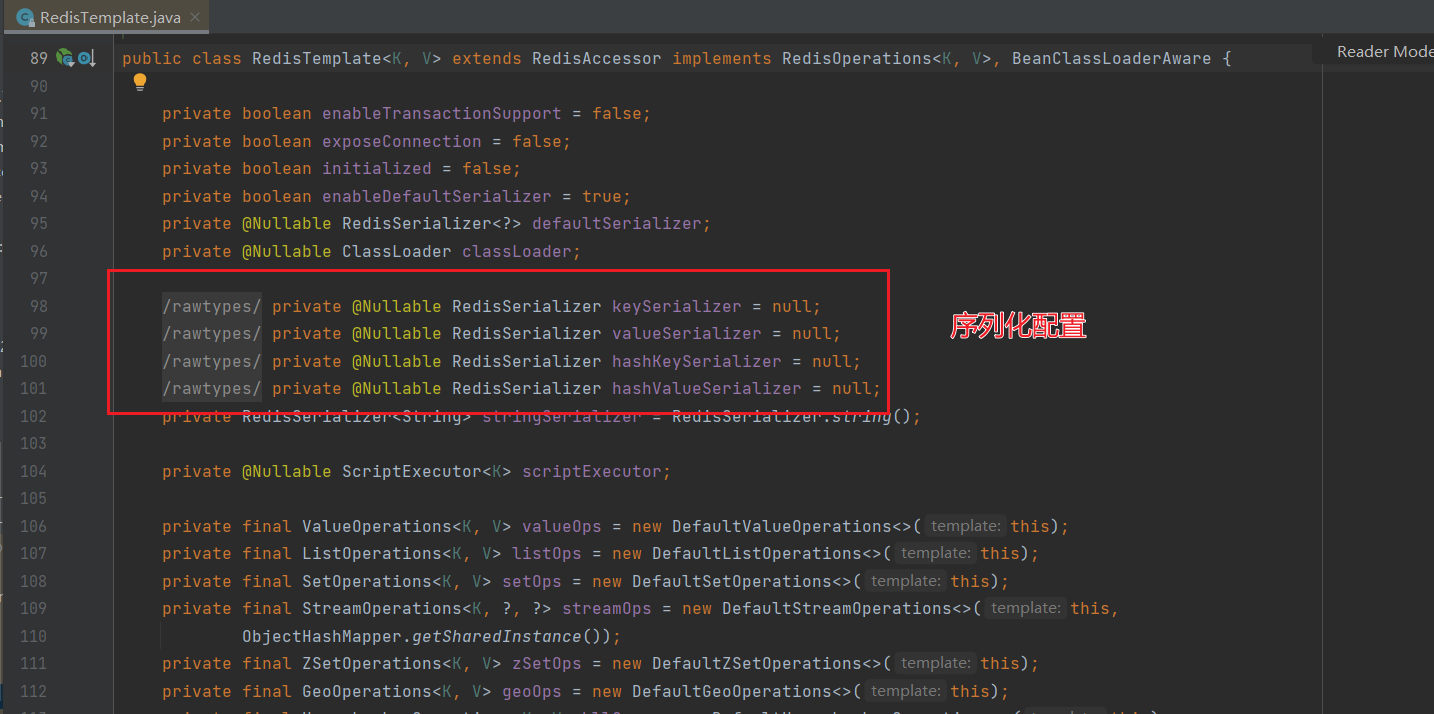

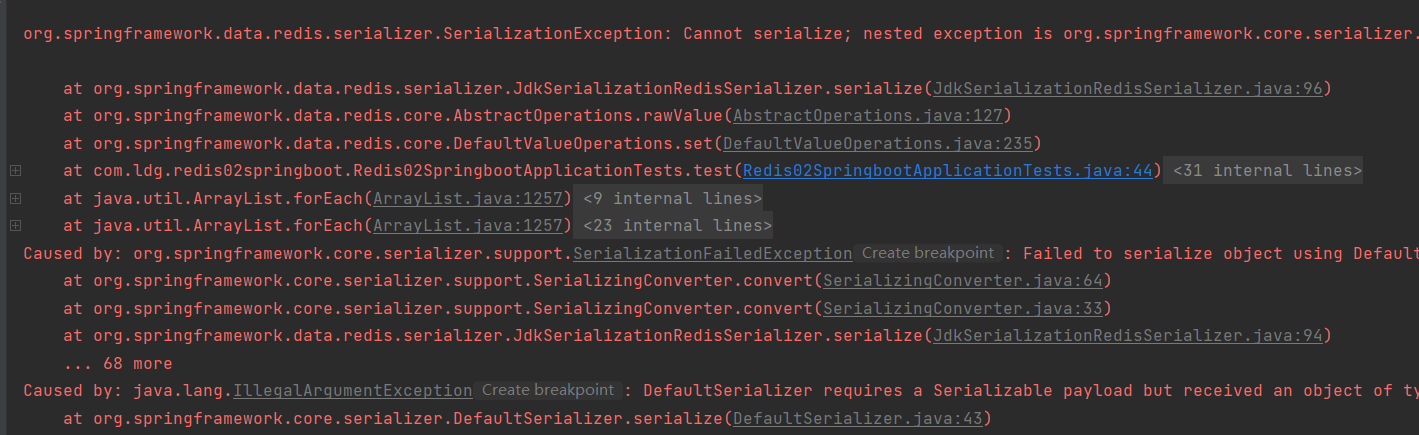
若在测试代码中,不对对象进行序列化,则会提示如下错误
测试代码:
1 |
|
User的Pojo类:
1 |
|
解决序列化方式一:在POJO类中实现Serializable接口
1 |
|
结果:
1 | User(name=ldg, age=21) |
解决序列化方式二:在测试代码中,自动进行序列化
1 |
|
输出:
1 | {"name":"ldg","age":21} |
解决服务器乱码问题:
配置自己的RedisConfig,通过设置序列化的方式,解决服务端乱码的问题
1 | import com.fasterxml.jackson.annotation.JsonAutoDetect; |
测试代码:
1 | import com.fasterxml.jackson.core.JsonProcessingException; |
服务器端的keys *:
1 | 127.0.0.1:6378> keys * |
RedisUtil工具类
1 | import org.springframework.beans.factory.annotation.Autowired; |
IDEA测试:
1 |
|
IDEA输出:
1 | ldg |
服务器段输出:
1 | 127.0.0.1:6378> keys * |